
ER collet runout can affect surface finish, dimensional accuracy, tool life and overall machining stability. In severe cases, excessive runout may cause vibration, uneven cutting-edge wear or premature failure of small-diameter tools.
The good news is that runout does not always mean the collet or toolholder must be replaced. Contamination, incorrect assembly, improper tightening and excessive tool overhang can all increase total indicated runout.
This guide explains what ER collet runout is, how to measure it and how to identify the most common causes.
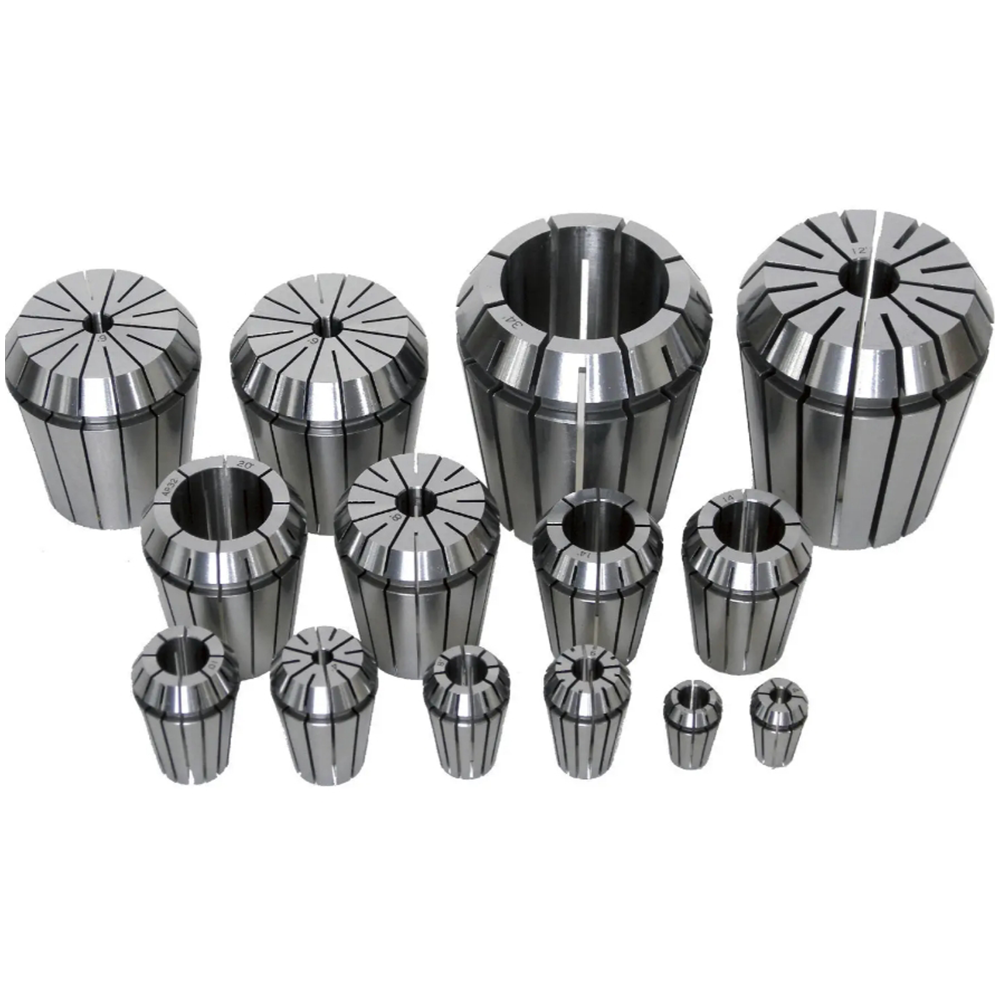
What Is ER Collet Runout?
Runout describes how far a rotating tool deviates from its intended centerline.
Ideally, the cutting tool, ER collet, toolholder and machine spindle should rotate around the same axis. If one part is off-center, tilted, contaminated or damaged, the cutting edge may move toward and away from the workpiece during each revolution.
Runout is normally expressed as TIR, or Total Indicator Reading. TIR is the difference between the highest and lowest readings observed on a dial test indicator while the spindle or tool assembly is rotated through one complete revolution.
For example, if the indicator moves from 0.002 mm to 0.010 mm, the measured TIR is:
0.010 mm − 0.002 mm = 0.008 mm TIR
Runout should not be confused with balance. Runout relates to geometric deviation from the rotational axis, while imbalance concerns uneven mass distribution during rotation. A tool assembly can have acceptable balance but excessive runout, or low runout but inadequate balance for high-speed operation.
Why Excessive Runout Matters
When a multi-flute cutting tool runs off-center, its cutting edges do not share the load equally.
One flute may remove more material while another flute removes less. The heavily loaded cutting edge then generates more heat and wears faster. The resulting process can become increasingly unstable as machining continues.
Excessive tool runout may contribute to:
- Uneven cutting-edge wear
- Reduced tool life
- Poor or inconsistent surface finish
- Oversized or out-of-round holes
- Difficulty holding dimensional tolerances
- Chatter, vibration and unusual cutting noise
- Reduced performance of small-diameter tools
- Premature tool breakage
- Inconsistent results between tool changes
Runout becomes especially important in precision drilling, reaming, finishing and micro-machining. As tool diameter decreases, even a small amount of radial error represents a larger percentage of the tool diameter.
Toolholding manufacturers therefore place significant emphasis on low system runout. However, the final result depends on the complete assembly—not only the collet.
How to Measure ER Collet Runout
A dial test indicator and a precision test bar provide a practical way to measure runout.
Whenever possible, use a certified test bar rather than a cutting tool. A worn, tapered or damaged cutting-tool shank may introduce its own error and make it difficult to determine whether the problem comes from the tool or the holder.
Equipment Required
Prepare the following:
- A clean precision test bar
- A dial test indicator with suitable resolution
- A rigid magnetic base or indicator holder
- The ER collet, nut and toolholder being tested
- Approved cleaning tools
- A torque wrench and the correct nut adapter
Step 1: Clean the Complete Assembly
Remove the collet and nut from the toolholder.
Clean:
- The machine spindle taper
- The external taper of the toolholder
- The internal ER collet pocket
- The collet surfaces and slots
- The collet nut
- The test bar or tool shank
Check carefully for chips, dried coolant, oil residue, burrs, corrosion and embedded particles.
Even a small contaminant between two locating surfaces can tilt the assembly and create measurable runout.
Step 2: Inspect the Components
Look for:
- Fretting or wear on the toolholder taper
- Damaged collet slots
- Burrs on the collet or tool shank
- Cracks or permanent deformation
- Damage to the nut’s eccentric extraction ring
- Uneven wear inside the collet
- A bent or scored test bar
Do not continue using a visibly cracked or permanently deformed collet.
Step 3: Assemble the Collet Correctly
The collet should first be engaged with the eccentric ring inside the nut. Push the collet into the nut until it seats correctly.
Only then should the nut-and-collet assembly be threaded onto the toolholder.
Do not insert the collet directly into the holder and then tighten the nut over it. Incorrect assembly may prevent proper seating and can increase runout or damage the collet.
For more information about ER collet construction and operation, see our guide to ER collet types, sizes and CNC applications.
Step 4: Insert the Test Bar
Insert the test bar deeply enough to engage most of the collet’s clamping length.
Whenever possible, the shank should extend through the full clamping length. Avoid clamping only the end of the collet. As a practical minimum, the shank should engage at least two-thirds of the collet length unless the manufacturer specifies otherwise.
Keep the overhang as short as the application allows. Excessive projection can magnify angular error at the measuring point.
Step 5: Tighten to the Correct Torque
Hand-tighten the nut, place the assembly in a suitable tightening fixture and use a calibrated torque wrench.
Always follow the torque recommendation supplied by the manufacturer of the collet nut or toolholder. Torque requirements vary by ER size, nut design, collet diameter and manufacturer.
Insufficient torque can reduce clamping consistency. Excessive torque can damage the collet, nut or holder and may increase runout rather than reduce it.
Step 6: Position the Indicator
Mount the toolholder in the machine spindle or a qualified inspection fixture.
Place the indicator tip against the test bar:
- First measure close to the collet nose.
- Then measure farther from the nose, such as at a distance commonly used by the holder manufacturer.
Measuring at two positions helps distinguish simple radial offset from angular misalignment. If the reading increases significantly farther from the collet, the assembly may be tilted or the test bar may be bent.
Step 7: Rotate the Assembly Slowly
Rotate the spindle or toolholder slowly by hand through one full revolution.
Do not perform this check at machining speed.
Record the highest and lowest indicator readings. The difference is the TIR.
Repeat the rotation to confirm that the result is consistent.
What Is an Acceptable ER Collet Runout?
There is no single runout value that is acceptable for every machining operation.
The appropriate limit depends on:
- Tool diameter
- Tool length and overhang
- Machining operation
- Required surface finish
- Dimensional tolerance
- Spindle speed
- Toolholder and collet specification
- Measurement distance
- Condition of the machine spindle
Precision toolholding systems may specify runout in only a few micrometers, while general-purpose ER systems may allow a higher value. The result should therefore be compared with the specifications of the complete holder, collet and nut system at the stated measuring distance.
When reviewing a supplier specification, confirm whether it describes:
- The collet alone
- The toolholder alone
- The assembled system
- Runout measured in the clamping bore
- Runout measured on a test bar
- The distance between the collet face and measuring point
A number without its measurement method is not sufficient for a meaningful comparison.
Common Causes of ER Collet Runout
1. Chips or Contamination
Contamination is one of the first things to investigate.
A chip in the collet pocket, dirt between the collet and nut or residue on the tool shank can prevent concentric seating. Cleaning is inexpensive, fast and should be completed before replacing components.
2. Incorrect Collet Assembly
The collet must engage correctly with the eccentric ring inside the nut before the nut is installed on the holder.
If this step is skipped, the collet may not seat or release correctly. The result may be excessive runout, poor clamping and premature wear.
3. Wrong Collet Size
Choose a collet whose specified clamping range matches the tool-shank diameter.
Do not force an oversized shank into a smaller collet. Excessive collapse or expansion can deform the collet and reduce accuracy.
If you are uncertain which series or size to use, review our ER11, ER16, ER20, ER25 and ER32 size comparison.
4. Improper Tightening Torque
Both under-tightening and over-tightening can cause problems.
A standard hand wrench cannot confirm the applied torque. For repeatable tool setup, use a torque wrench, the correct adapter and a stable tightening fixture.
Do not assume that applying more force will automatically reduce runout.
5. Insufficient Shank Engagement
If the tool shank engages only a small part of the collet, the clamping pressure is not distributed across the intended contact area.
This can reduce rigidity and increase the influence of angular error.
Use the full clamping length whenever possible and avoid positioning flutes, flats or relieved sections inside a collet intended for a cylindrical shank.
6. Excessive Tool Overhang
A long overhang increases the measured displacement caused by a small angular error.
Use the shortest practical tool projection that still provides the required reach and clearance.
Reducing overhang can improve rigidity, decrease vibration and make the measured runout at the cutting edge more stable.
7. Worn or Damaged Collet
ER collets are wear components.
Repeated tightening, contamination, overload and incorrect tool sizes can damage the precision surfaces. If cleaning and correct assembly do not restore an acceptable result, test the setup with a known-good collet.
Replace collets that are cracked, permanently distorted, heavily corroded or visibly worn.
8. Damaged Nut or Toolholder
The collet is not the only possible source of error.
A damaged eccentric ring, worn nut thread, fretting on the holder taper or damage inside the collet pocket can affect concentricity. Test suspect components individually instead of replacing only the collet.
9. Tool-Shank Error
The cutting tool itself may be bent, worn or out of round.
Measure the shank separately or replace it temporarily with a certified test bar. If the test-bar result is acceptable but the cutting-tool result is not, the tool is probably contributing to the error.
10. Machine Spindle or Interface Error
If several qualified toolholders produce similar runout in the same spindle, inspect the machine-tool interface.
Potential causes include:
- Contamination inside the spindle taper
- Spindle-taper damage
- Incorrect retention components
- Bearing wear
- Tool-change alignment problems
- Thermal instability
At this stage, the machine manufacturer or a qualified service technician may need to inspect the spindle.
Step-by-Step ER Collet Runout Troubleshooting
Use the following sequence to avoid replacing parts unnecessarily.
Step 1: Confirm the Measurement
Repeat the measurement with the same setup.
Make sure the indicator base is rigid, the contact point is stable and the spindle is rotated slowly.
Step 2: Replace the Cutting Tool with a Test Bar
If runout decreases, inspect the original cutting-tool shank.
If it remains high, continue checking the holder assembly.
Step 3: Clean and Reassemble
Clean every locating and clamping surface. Snap the collet into the nut correctly, insert the test bar and tighten using the specified torque.
Measure again.
Step 4: Rotate the Collet
Mark the initial position of the collet relative to the holder. Reassemble it in a different rotational position and measure again.
A significant change may help identify whether the error follows the collet or remains with the holder.
Do not use rotational adjustment as a permanent substitute for replacing a damaged component.
Step 5: Test a Known-Good Collet and Nut
Replace one component at a time.
This makes it easier to determine whether the problem comes from the collet, nut, holder, test bar or machine spindle.
Step 6: Test the Holder in Another Qualified Spindle or Fixture
If possible, inspect the assembly independently of the machine spindle.
If the holder performs correctly outside the machine but poorly inside it, investigate the spindle interface.
When Should an ER Collet Be Replaced?
Consider replacing the collet when:
- It has visible cracks or deformation
- Cleaning does not restore consistent runout
- The internal surface is damaged
- The slots contain embedded material that cannot be removed safely
- Clamping has become inconsistent
- A known-good collet produces a significantly better result
- It has repeatedly been used with incorrect shank sizes
- The required machining accuracy exceeds the collet’s specification
Store collets clean and dry. Avoid placing precision surfaces directly against other metal tools, and protect them from corrosion and impact.
How to Maintain Low Runout
A repeatable preventive-maintenance routine can reduce setup problems.
Recommended practices include:
- Clean the spindle, holder, collet, nut and tool shank during setup
- Inspect collets regularly for wear and damage
- Snap the collet into the nut before assembly
- Select the correct collet size
- Use adequate shank engagement
- Minimize tool overhang
- Use a calibrated torque wrench
- Follow the nut manufacturer’s torque specification
- Store precision components in a clean, protected location
- Record runout for critical assemblies
- Replace worn components before they affect production
Runout should be managed as a complete-system issue. The tool, collet, nut, holder, spindle interface and measurement method all influence the final result.
Frequently Asked Questions
What does TIR mean in tool runout measurement?
TIR means Total Indicator Reading. It is the difference between the maximum and minimum indicator readings observed during one complete rotation.
Can a dirty ER collet cause runout?
Yes. Chips, dried coolant, oil residue and other contamination can prevent the collet from seating concentrically. Always clean the complete assembly before diagnosing damaged components.
Can overtightening an ER collet increase runout?
Yes. Excessive torque may damage the collet or nut and can increase runout. Use a calibrated torque wrench and follow the manufacturer’s specification.
Should an ER collet be inserted into the holder before the nut?
No. The collet should first be engaged with the eccentric ring in the nut. The assembled nut and collet are then threaded onto the holder.
Where should ER collet runout be measured?
Measure close to the collet nose and again at a defined distance along a precision test bar. Always state the measurement distance when comparing results.
Does lower runout improve tool life?
Lower runout helps distribute cutting load more evenly between cutting edges. This can support more consistent wear, better surface quality and longer tool life, although cutting parameters, rigidity, coolant and tool condition also affect the result.
Is runout the same as concentricity?
The terms are related but not identical. Concentricity describes alignment of centers or axes, while runout is the measured variation of a rotating surface relative to a reference axis.
Improve the Accuracy of Your ER Toolholding System
Low runout begins with the right combination of collet, nut, toolholder and setup method.
Eversource provides ER collets and CNC toolholding components for different tool diameters and machining requirements. Explore our ER collet product range or contact us to discuss the appropriate size, accuracy requirement and configuration for your application.
Need help selecting an ER collet?
Send us your tool-shank diameter, ER series, machining operation and required runout level. Our team will help you identify a suitable solution.
learn more on our Youtube channel: https://youtu.be/y6doZYvid10?si=SyoIr_6Y5D-He5Zy